

Boat Won’t Start? Troubleshooting Tips for Lake Havasu Boat Owners Before Engine Repair
- Marine One Motorsports

- May 12
- 11 min read
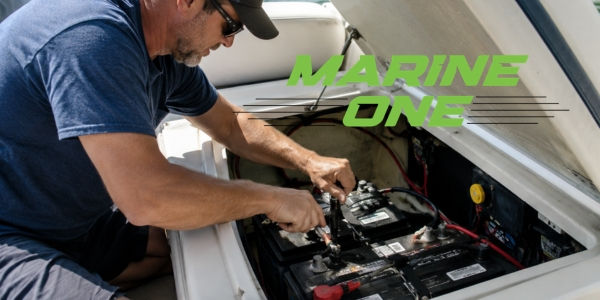
At the time your outboard won't start on a Lake Havasu morning, the culprit is often simpler than you think. Batteries cause more trouble than any other component in marine electrical systems, especially when you have a fully charged battery that should read around 12.6 volts at rest. Marine engines need three essential elements: air, fuel, and spark. Lake Havasu's extreme heat and seasonal storage patterns can magnify common boat engine problems, from dead batteries to stale fuel. We'll walk you through systematic troubleshooting steps and help you recognize the right time for professional marine engine repair.
Quick Safety and Basic Checks
Run through four critical safety checks that solve most boat won't start problems before you troubleshoot complex systems. These simple verifications take less than two minutes and prevent unnecessary diagnostic work.
Is Your Kill Switch Connected?
The lanyard clip must snap into the switch body. You should feel and hear a positive click when seated right. Many boat owners find their clip is hanging off by one corner, which prevents internal contact closure. The plastic clips wear out over time and won't seat right even when they appear undamaged.
A 2021 law requires vessel operators to use either a helm or outboard lanyard or wireless engine cutoff switch on certain vessels less than 26 feet when traveling on plane or above displacement speed. If you use a wireless cutoff switch, check that batteries in the fobs and wrist devices are fresh. The kill switch operates by grounding the ignition system on outboards. With the lanyard clip in place, there should be no continuity between terminals. The resistance should be infinite.
Try a different lanyard if you have one available. If the clip seats right but your outboard motor still won't start, test the ground wire for continuity between the downstream side of your kill switch and the engine block. Corrosion in switch contacts creates another common failure point that prevents ignition circuit completion.
Check if Boat is in Neutral
Your engine won't start if the boat is in gear, though other components like lights and gages will still function. Verify the gearshift lever sits solid in the middle position between forward and reverse. The neutral safety switch prevents starting in gear as a safety mechanism.
If your motor cranks in gear but not in neutral, the shift interrupt switch has become misaligned. Move the throttle back and forth while you try to start, as the switch may be out of position. Lake Havasu's summer heat can cause shift linkage components to expand and affect switch alignment.
Verify Battery Switch is On
Battery switches left in the OFF position cause frequent starting failures. On boats equipped with two batteries or a battery switch, verify it's set to ON or BOTH before you attempt to start. This simple oversight accounts for countless calls to marine mechanics in Lake Havasu City. The battery switch prevents battery drain during storage, but you must turn it back on before you start your engine.
Check that the switch is engaged, not turned part way. A switch left between positions won't deliver adequate power to the starter system.
Inspect for Obvious Fuel Issues
Check your fuel gage and inspect the tank. Water or debris could have settled in the fuel after sitting through Lake Havasu's off-season. A clogged vent creates vacuum lock and prevents fuel from reaching the engine.
Inspect fuel lines, fuel tank fill and vent hoses for softness, brittleness or cracking. Check all joints for leaks and verify all lines are supported with noncombustible clips or straps with smooth edges. Portable tanks and lines should be drained of stale fuel before you fill with fresh fuel. Fuel evaporates from the engine filter after extended storage, which makes it hard for the fuel pump to prime the system.
If these simple checks don't resolve your starting problem, the issue lies deeper in the electrical, fuel, or ignition systems.
Battery and Electrical System Problems
Electrical failures rank among the most frustrating boat motor problems because symptoms can mislead you. Lake Havasu's intense summer heat accelerates battery deterioration and increases corrosion buildup on connections. This makes electrical troubleshooting a must-know skill.
Testing Your Boat Battery Voltage
Use a voltmeter to measure battery charge before you assume other problems exist. Set your multimeter to DC voltage and touch the red probe to the positive terminal and black probe to the negative terminal. A fully charged 12V marine battery reads around 12.6 to 12.8 volts when resting. Readings below 12.4V show the battery needs recharging.
Test after the battery has been sitting for at least an hour without charging to get accurate resting voltage. A test right after charging produces inflated readings that don't reflect true battery health. A battery reading 12.4 volts sits at about half charge, while 12.2 volts means it's flat. The battery enters discharged territory where sulfation occurs and permanent damage begins below 12 volts.
Marine batteries lose performance through incomplete charging cycles and repeated deep discharges. A battery may show adequate voltage but lack sufficient cranking amps to turn the engine. Replacement becomes needed if your battery is several seasons old and produces slow cranks, whatever the voltage readings show.
Checking for Corroded or Loose Connections
Remove corrosion from battery terminals with a wire brush, as buildup disrupts electrical contact. Lake Havasu's salt air accelerates terminal corrosion and creates resistance that limits energy reaching your starter. Connection problems show up as clicking sounds without engine crank, flickering dash electronics when turning the key, and visible corrosion around terminals.
Battery cables must attach securely to terminals. Loose connections prevent the starter from drawing enough power to turn the engine over. Battery cables that feel warm after you attempt to start show high-resistance connections that generate heat. Corrosion appears as white or gray deposits that show lead sulfate buildup, while blue or green crusty formations signal copper corrosion.
Starter Motor Symptoms
You may hear a single click or nothing at all when the starter motor fails. Internal components degrade in marine environments where moisture and vibration stress electrical systems. A clicking starter doesn't always mean replacement is needed. It could show a low battery, bad fuse, or faulty solenoid.
The starter is receiving power but can't engage the flywheel if you hear clicking but no engine crank. No noise at all when turning the key suggests complete starter motor failure or loose connections between the starter and battery.
Blown Fuses and Bad Ground Connections
Inspect the engine's fuse box for blown fuses, which show a broken filament. Blown inline fuses near the battery or tripped main breakers interrupt power to your starting circuit. Replace blown fuses with the correct amperage, but if fuses continue failing, an underlying electrical issue requires professional marine engine repair attention.
Poor grounding causes erratic electrical behavior and voltage drops. Ground wires must connect to the engine block or dedicated grounding bus bar linked to the battery negative terminal. Corrosion on ground wires creates resistance that prevents stable power flow throughout your boat's electrical system.
Fuel System Troubleshooting
Fuel starvation stops more boat motors than any other mechanical issue, especially after the intense summer boating season at Lake Havasu. A blocked vent, air leak, or contaminated fuel will prevent your engine from running whatever the condition of your electrical system.
Fuel Supply and Tank Vent Verification
Vent blockages create vacuum inside the fuel tank that prevents fuel flow to the engine. A restricted vent might be the cause if your engine sputters or stalls during operation. You'll notice difficulty filling your fuel tank, along with gurgling or slow filling. Remove your fuel cap while the engine runs. Performance improves right away if your vent line is blocked.
The desert environment at Lake Havasu allows spiders and insects to build nests inside vent fittings. Check the vent line visually for kinks, blockages, or damage. Inspect the vent fitting for cracks or loose connections and check the flame arrestor for debris. A clogged anti-siphon valve restricts airflow and mimics fuel pump failure symptoms.
Proper Fuel System Priming
Mercury Four Stroke outboards 60hp and below use a primer bulb located in the fuel line between the fuel tank and engine. Pump the bulb until it's firm, which usually takes only a few pumps. The line is charged when the bulb is firm and you can start the engine.
Hold the primer bulb vertically with the arrow pointing upward when you squeeze. It may not move any fuel at all if held horizontally. The onboard electric fuel pump primes the system automatically for outboards 75hp or greater. Turn the key to the run position and wait for a beep followed by the fuel pump running.
The bulb may not harden after you replace fuel filters because air trapped in the system prevents proper priming. Disconnect the fuel line from the engine side of the bulb, hold it vertically with the arrow pointing up, squeeze until collapsed, cover the open hose barb with your finger, then release. Repeat several times until fuel reaches the bulb.
Fuel Filter and Line Inspection
Replace primary fuel filters every 50 hours and secondary filters every 100 hours, or once a year. Air leaks between the engine and fuel tank cause the engine to run out of fuel and die without warning, which means you must re-prime the bulb. Start at the engine and follow the fuel line back to the tank. Look for cracked, brittle, or soft hoses and loose or missing hose clamps and damaged primer bulbs.
Fuel hoses with non-permeable liners can delaminate from the outer hose and twist to block fuel flow. Attwood brand hoses and those with gray UV-protective coating seem to have more delamination problems.
Water Contamination in Fuel
Water in fuel causes engine hesitation with a spluttering sound and trouble accelerating. Drain a couple pints of fuel from the fuel filter into a clean glass jar and let it sit for half an hour. Uncontaminated fuel appears amber, while water forms a clear bubble or layer at the bottom because it's denser than gasoline. Phase separation creates an opaque gelatinous layer at the bottom. Condensation that forms within the fuel tank is the number one cause of water contamination. Fill your tank to capacity during storage so there's no room for condensation to form.
Ignition and Spark Problems
No spark means no combustion. Diagnosing ignition problems requires systematic testing from spark plugs backward through the ignition chain.
Checking Spark Plugs
Pull the spark plugs out and inspect them for deposits, erosion, or discoloration that show engine problems. Black oily deposits suggest excessive oil is reaching the combustion chamber. White or gray coloration signals overheating. Breaks or erosion in the insulator tip or electrodes need replacing right away.
Reconnect the plug wire and test spark. Hold the plug against the engine block for metal-to-metal ground and crank the motor. Strong blue spark shows proper ignition. Weak orange or yellow spark shows ignition weakness. An inline spark tester gives safer and more visible results.
Gap new plugs before installation with an inexpensive gap gage. Spark may be too weak to ignite fuel if the gap between electrodes is too narrow. Gaps too wide cause the plug to miss at high speeds entirely. Bend the ground electrode gently with a flat-head screwdriver to adjust.
Testing Ignition Coil and Wiring
Set your multimeter to ohms and test primary coil resistance, which measures 0.1 to 1.0 ohms typically. Secondary resistance should read between 3,000 and 15,000 ohms, or 6,000 to 7,000 ohms for older outboards. Compare readings between coils, as they should produce similar values.
No spark on all cylinders shows problems before the CDI unit. No spark on one cylinder points to that specific ignition coil or wire. Check plug wires for cracks, cuts, or burn marks. Measure wire resistance end-to-end and check boot connections at both ends[211].
Distributor Cap and Rotor Issues
Loosen screws and remove the old cap to replace worn distributor caps and rotors. Pull off the rotor and install new components. Transfer spark plug wires one at a time to keep correct firing order. Heat-related ignition failures affect CDI modules commonly in Lake Havasu's extreme temperatures.
When to Call a Lake Havasu Marine Mechanic
Some problems exceed DIY troubleshooting capabilities and call for professional marine engine repair expertise.
Signs Your Boat Engine Needs Professional Repair
Unusual engine noises signal internal problems that just need immediate attention. Knocking, grinding, or whining sounds indicate worn bearings, misaligned components, or failing parts. Decreased performance where your boat struggles to reach normal speeds points to issues that just need proper diagnostics. Overheating calls for immediate shutdown when your temperature gage climbs into the red zone or steam rises from the engine compartment. Unresponsive throttle, shift, or steering controls create safety hazards from worn cables, loose connections, or hydraulic leaks. Difficulty starting, stalls, or reduced power may stem from fuel system issues or worn components that need expert attention.
Arizona Heat-Related Engine Problems
Lake Havasu's extreme temperatures cause heat-related ignition system failures during high throttle use. Components like ignition coils or starter solenoids fail when engines heat up. Summer heat creates harsh conditions that weaken battery chemistry and accelerate marine battery wear.
Finding a Reliable Boat Repair Shop in Lake Havasu
Don't let engine trouble ruin your time on the water if your boat won't start. The experienced team at Marine One Motorsports provides reliable engine repair and marine diagnostics for boat owners throughout Lake Havasu City. Whether you're dealing with battery issues, fuel system problems, or unexpected engine failure, we're here to help get you back on the lake quickly and safely. Contact Marine One Motorsports today to schedule professional boat engine service and keep your boat running at its best all season long.
Conclusion
Most boat starting problems come down to dead batteries, stale fuel, or poor connections. Lake Havasu's extreme heat amplifies these issues and makes regular maintenance critical for reliable performance. We've covered systematic troubleshooting from safety checks through electrical, fuel, and ignition systems.
Professional marine engine repair becomes your best option if you've worked through these steps without success. Complex problems need diagnostic equipment and expertise that go beyond DIY troubleshooting. Reach out to an experienced boat repair Lake Havasu shop instead of risking further damage. Preventative maintenance and timely professional service keep you on the water instead of stuck at the dock.
Key Takeaways
When your boat won't start at Lake Havasu, systematic troubleshooting can save you time and money while getting you back on the water faster.
• Start with basic safety checks: verify kill switch connection, neutral position, battery switch on, and fuel supply • Test battery voltage (should read 12.6V), clean corroded terminals, and check for loose electrical connections • Prime fuel system properly, inspect for blocked vents, and drain contaminated fuel that appears cloudy or separated • Test spark plugs for proper gap and strong blue spark; weak orange spark indicates ignition system problems • Call professional marine mechanics for unusual engine noises, overheating, or persistent starting issues after basic troubleshooting
Lake Havasu's extreme heat accelerates battery deterioration and fuel contamination, making regular maintenance essential for reliable boat performance throughout the boating season.
FAQs
Q1. Why does my boat have power but won't start?
When your boat has electrical power but won't start, the issue typically lies with the fuel system, ignition components, or safety switches. Common causes include a disconnected kill switch lanyard, the boat being in gear instead of neutral, a clogged fuel vent preventing fuel flow, or faulty spark plugs that aren't creating the spark needed for combustion. Check these basic systems first before moving to more complex diagnostics.
Q2. How can I tell if my boat's starter solenoid has failed?
A faulty starter solenoid produces two distinct symptoms. You'll hear a clicking sound when turning the key, but the engine won't crank—this means the solenoid engages but fails to send current to the starter motor. Alternatively, you may experience complete silence with no sound or movement when attempting to start, indicating the solenoid coil has completely failed and isn't allowing any electrical current to flow.
Q3. What causes most boat engine failures?
The propulsion system accounts for the majority of boat engine failures, with overheating and fuel system problems being the most frequent culprits. Cooling systems can become blocked by algae, sand, or debris, while damaged water pumps or faulty thermostats lead to dangerous temperature increases. Fuel contamination, clogged filters, and blocked vents also commonly prevent engines from running properly.
Q4. How do I know if my boat's fuel pump is failing?
Rapid fuel consumption is a telltale sign of a deteriorating fuel pump. If you notice your fuel tank emptying significantly faster than normal, your fuel system likely has problems. Other symptoms include difficulty starting, engine sputtering during operation, and loss of power at high speeds. Monitor your typical fuel usage patterns so you can quickly identify when consumption becomes abnormally high.
Q5. What voltage should a fully charged marine battery read? A fully charged 12-volt marine battery should read between 12.6 and 12.8 volts when tested at rest with a voltmeter. Readings below 12.4 volts indicate the battery needs recharging, while 12.2 volts means it's essentially flat. Test the battery after it has been sitting for at least an hour without charging to get an accurate reading, as testing immediately after charging produces inflated results.


Comments